
Cart
0
Warning
1.Do not use soap, detergent, diluent, gasoline, alcohol, or other volatile solvents to clean the system. Otherwise, it may cause cracks, scratches, and discoloration.
2.Do not install or store the system in a location exposed to direct sunlight, as this may cause the aging of the product parts, or clog the filter because of the algae growth.
3.Do not place the system near flammable or volatile substances, heat sources, or fire.
4.Do not install the system in an outdoor environment. Be sure to use the system at a temperature of 4-40℃. When the water temperature is below 0℃, shut off the water supply and drain the residual water to prevent the system from freezing and being damaged.
5.The working pressure of this system is 0.1-0.5 MPa. When the water pressure is lower and higher, install a pressurizer or a pressure reducer accordingly.
Product Introduction
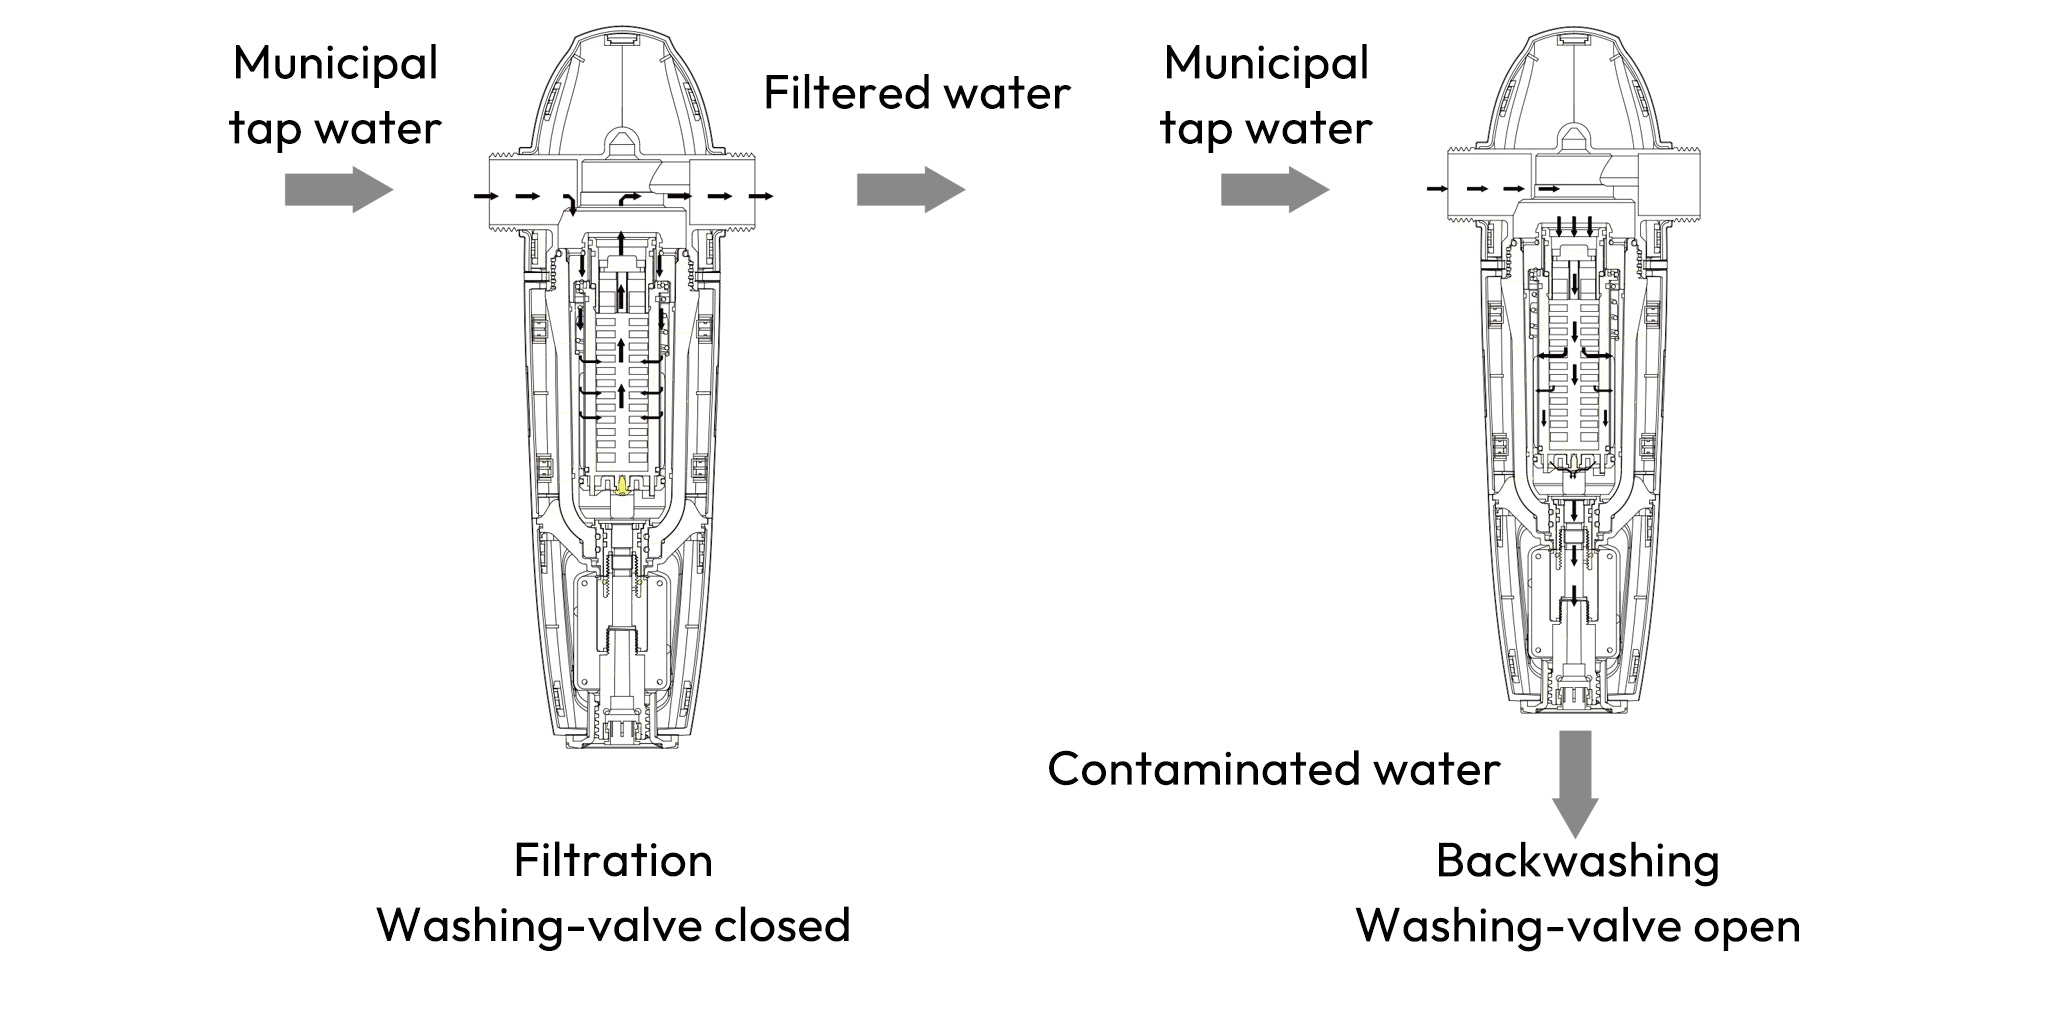
The Full-Automatic Backwash Spin-down Sediment Filtration System filters municipal tap water through a stainless-steel filter mesh, which can filter out sediment, rust, suspended solids, and parasites in the water. The system can be washed at any time and automatic self-backwashing function is built in. It effectively protects appliances such as water purifiers, water heaters, wall-hung boilers, washing machines, dishwashers, and solar showers.
Exploded View

Installation Guide
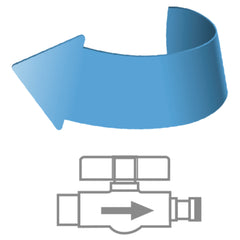
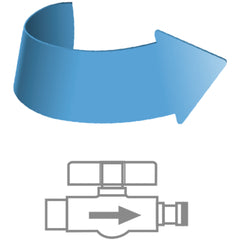
In order to fit differently-sized pipelines, three thread specifications (1’’MNPT, 3/4’’ FNPT, and 3/4’’ MNPT) and 3/4’’ Push-fit plumbing were applied to the inlet and outlet of the system, and a total of four installation methods were optional, which can be connected with PEX, CPVC, PPR and copper pipes. Please select the appropriate connection method according to the size of the pipe in your home. Pay attention to the water flow direction when installing. Taking the 3/4’’ MNPT thread specification and PEX pipe as an example:

Use 3/4” MNPT
1. Shut off the main inlet valve. Turn on the faucet to release the pressure inside the pipe.
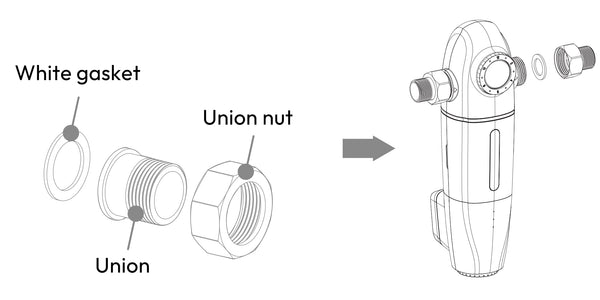
2. Take out the 3/4’’ MNPT adapter, insert the threaded union into the union nut and install the white gasket. Install the assembled adaptor on both sides and tighten or with a wrench.
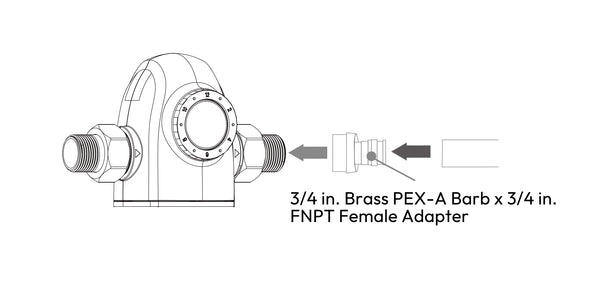
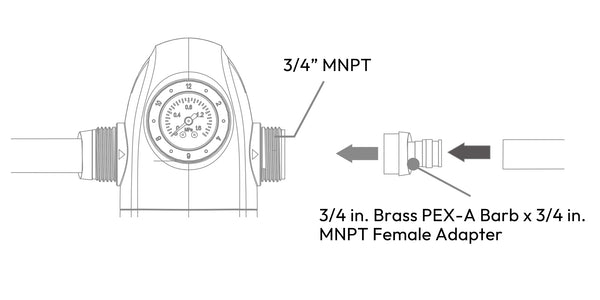
3. Wrap more than 10 loops of Teflon tape on the external thread of the union on the both sides. Install two 3/4 in. Brass PEX-A Barb x 3/4 in. FNPT Female Adapters (not included in the box) on the adapter, and tighten it with a wrench.
4. Cut off the appropriate length of PEX pipe. Fix the pipe on the system with two 3/4 in. Stainless-steel PEX Barb Pinch Clamps. Pay attention to the water inlet direction, and do not install it in the opposite direction. You can also use an expansion ring to fix the pipe.
5. Insert the drain tubing into the quick-connect threaded connector. Ensure that the tubing is inserted in place. You can lead the drain tubing to sewage outlets or a bucket.

NOTE: Please ensure the drain tubing is fully inserted and fixed to avoid sewage overflow.
6. Slowly turn on the main inlet valve. Turn off the water outlet after the domestic water equipment is able to dispense water seepage at the joints.
7. Open the battery case and install three batteries (AAA). When the power is turned on, the buzzer beeps once, and the three indicators flash blue three times. Then the sewage outlet is opened, and after 15 seconds, the sewage outlet is closed.

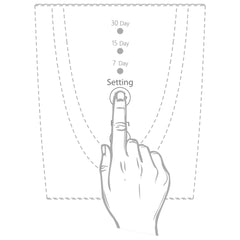
8. Set up flushing interval. By touching “Setting” button, you can choose 7,15 or 30 days as flushing interval period according to your household water quality. Corresponding indicator turns into blue after setting. The default flushing interval period is 15 days.
9. Touch “Flushing” button after setting and enter manual flushing state. Please flush the filter at least twice about 1 minute before firstly using.
Use 3/4” FNPT
a. Wrap at least 10 loops of Teflon tape on the 3/4” FNPT thread. Install two 3/4 in. Brass PEX-A Barb x 3/4 in. MNPT Male Adapters (not included in the box) on the adapter and tighten it with a wrench.
Refer to the installation steps above for further steps.
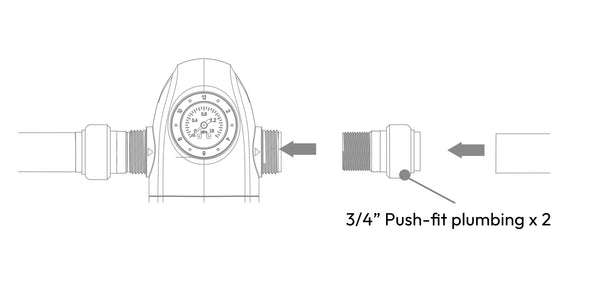
b. Use Push-fit Plumbing
1. Ensure that the cut of the pipe is flat and surface is smooth. If there are many impurities on the surface of the pipe, it should be polished with sandpaper before installation.
2. Wrap at least 10 loops of Teflon tape on the Push-fit plumbing thread, then install it in system and tighten it with a wrench.
3. Insert the pipe directly into the Push-fit plumbing fitting, which must be fully inserted; otherwise, there is a risk of water leakage.
4. With the help of the deeper a depth gauge tool, the pipe can be marked first and then inserted into the Push-fit plumbing fitting according to the marked depth.
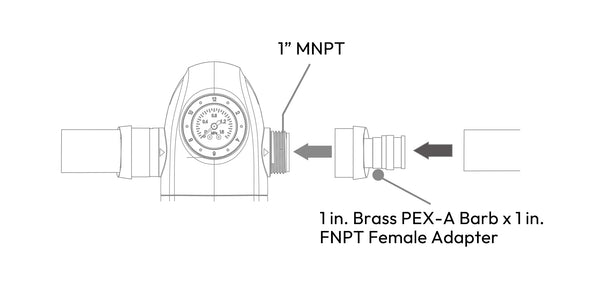
Use 1” MNPT
Wrap at least 10 loops of Teflon tape on the 1” MNPT thread. Install two 1 in. Brass PEX-A Barb x 1 in. FNPT Female Adapter (not included in the box) on the adapter and tighten it with a wrench.
Refer to the installation steps above for further steps.
NOTE: The external thread must be wrapped with at least 10 loops Teflon tape, and then connected to the internal thread and tightened with wrench.
Product Operation
Installation Position Schematic Diagram

Flushing Status
1. Automatic flushing When the set automatic flushing interval time is up, the filter starts draining sewage for 30 seconds. Meanwhile, the flushing interval period indicator flashes. Indicators are off when flushing is completed.
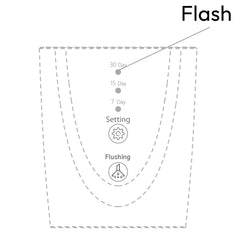
2. Manual flushing When the filtered is blocked, you can touch “Flushing” or “Setting” button to activate back-washing function immediately with buzzer beeping. Single back-washing lasts 30s and you can choose flushing times according to actual situation. The flushing interval is re-accumulated when it’s completed. During flushing, touch “Flushing” button and machine stops flushing with buzzer beeping.
3. Standby state and awake machine with no operation within 15s, indicators are off and machine is locked and on standby. You can awake the machine by touching either “Setting” or “Flushing” button with buzzer beeping.
Clean the Filter Mesh
When some sticky impurities are embedded in the filter mesh and cannot be discharged after the drain valve is turned on, which also affects the water output and pressure of the other equipment, the filter mesh should be flushed.
1. Shut off the main inlet valve. Turn on the drain valve to release the pressure inside the pipe.
2. Put the wrench on the transparent filter housing, and unscrew the filter bottle clockwise. It is recommended to use the container to catch the residual water in the filter housing. [Figure 1]

Figure 1
3. Take out the filter mesh and remove the impurities with a cleaning solution or brush. [Figure 2]
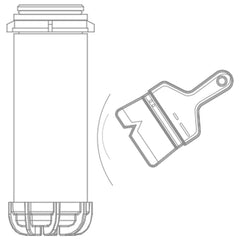
Figure 2
Note: Do not use a strong acid or alkaline cleaning solution.
4. Put the clean filter mesh back to the filter housing. [Figure 3]

Figure 3
5. Tighten the filter housing and machine head with a wrench.
6. Turn on the main inlet valve, and then check whether there is water leakage.
Direction for Use
1. After the installation, the user opens the water inlet valve and the filter starts to work normally. After the filter is working for a while, when the accumulated impurities looked through the transparent bucket have affected the water output of the household water equipment, the filter mesh can be cleaned.The flushing button at the bottom can be rotated to flush and discharge the filtered impurities.
2. When there are some sticky impurities accumulating on the filter mesh, or the impurities are embedded in the filter mesh, which cannot be cleaned by normal cleaning methods, and affects the water output and pressure of household water equipment, please contact Besdor after-sales service personnel for repair.
3. If there is any failure of the filter you purchased during use, do not disassemble the parts of the product in case of water leakage and damage to the product. Please turn off the water source, and then contact Besdor after-sales service personnel.
Fault Diagnosis and Troubleshooting
| Troubles | Possible Cause | Solutions |
| No outlet water | The water source does not have water | Wait for water to come back on |
| The inlet valve is not turned on | Turn on the inlet valve | |
| The surface of the filter mesh is blocked by coarse impurities | Clean the filer mesh | |
| Low outlet flow | The pressure of source water is too low | Adjust the source water pressure |
| The inlet valve is not fully turned on | Fully open the inlet valve | |
| The surface of the filters is partially blocked | Flush the filter mesh to remove impurities | |
| Water leakage or seepage at the joint | Not enough Teflon tape on the joint | Reapply Teflon tape and tighten |
| The parts in the leaking/seeping location not tightened. | Retighten the threaded joint with a wrench | |
| The sealing gaskets at the leaking/seeping location are damaged | Replace the sealing gaskets | |
| Filter parts have been disassembled | Check if the seal gaskets are missing | |
| Indicator is off or invalid buttons | Batteries run out. | Replace new batteries. |
| Indicator or control panel breaks down. | Contact service center. |
Note: Please do not disassemble the parts of the product in case that damage to the product.